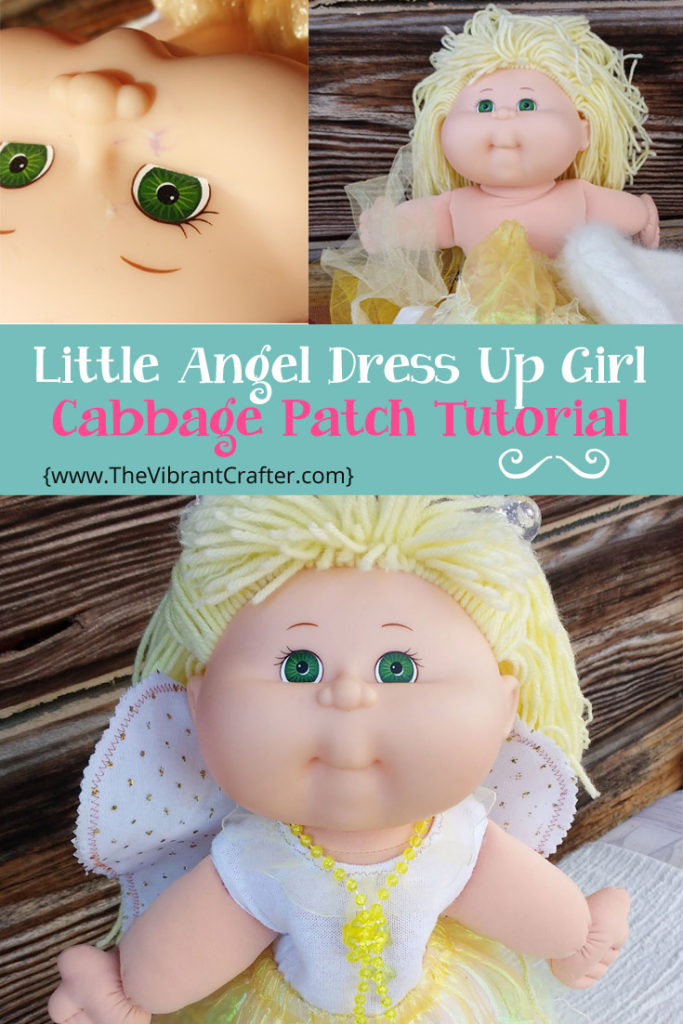
A Cabbage Patch Angel Tutorial
Who doesn’t love an angel doll at Christmas time? When I was a little girl my mother would make an angel doll for the top of the tree each year. I watched as she cut little bits of cardboard into wings and then covered them with silver paper (aluminum foil).
She would add bits of trim and lace, sometimes cutting up an old handkerchief to make a dress for one of my little plastic dolls. I loved that tradition and have often done the same thing at Christmas time as my daughters watched.
This year I had a request for a doll from a family who has a special needs angel of their own. She is a young teen unable to move very much. She was so tiny when she was born that they dressed her in Cabbage Patch doll clothes. “Oh,” I thought. “This angel needs an angel!” And the game was on.
I rummaged through my pile of Cabbies who patiently wait in boxes for their turn to be “up-loved”. When I pulled out this little sweetheart I knew she was “the one”.
She is smaller than many CPK’s with O.A.A. on the back of her neck and the Mattel copyright says 1997. She has a red (or is it pink?) signature on her left – er – cheek, and her head is – well – quite large, but lovely.
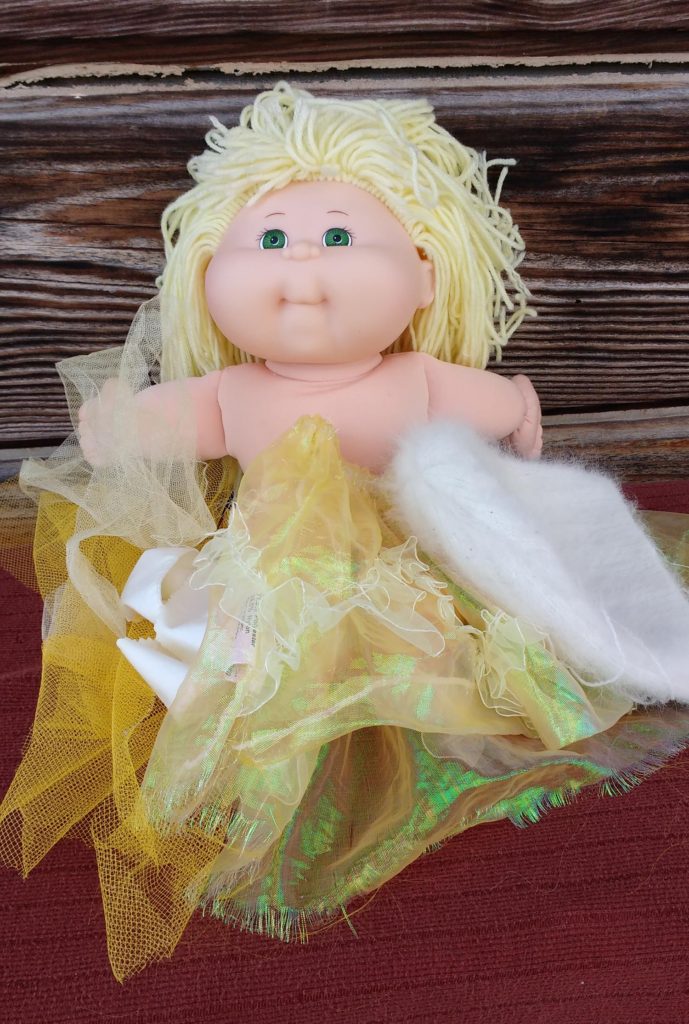
I went through my scrap stash and came up with some possible “angel ingredients.”
[Promo: Check out my new Cabbage Patch Mermaid Makeover course – easy and fun!]
The only problem with this little girl was this:
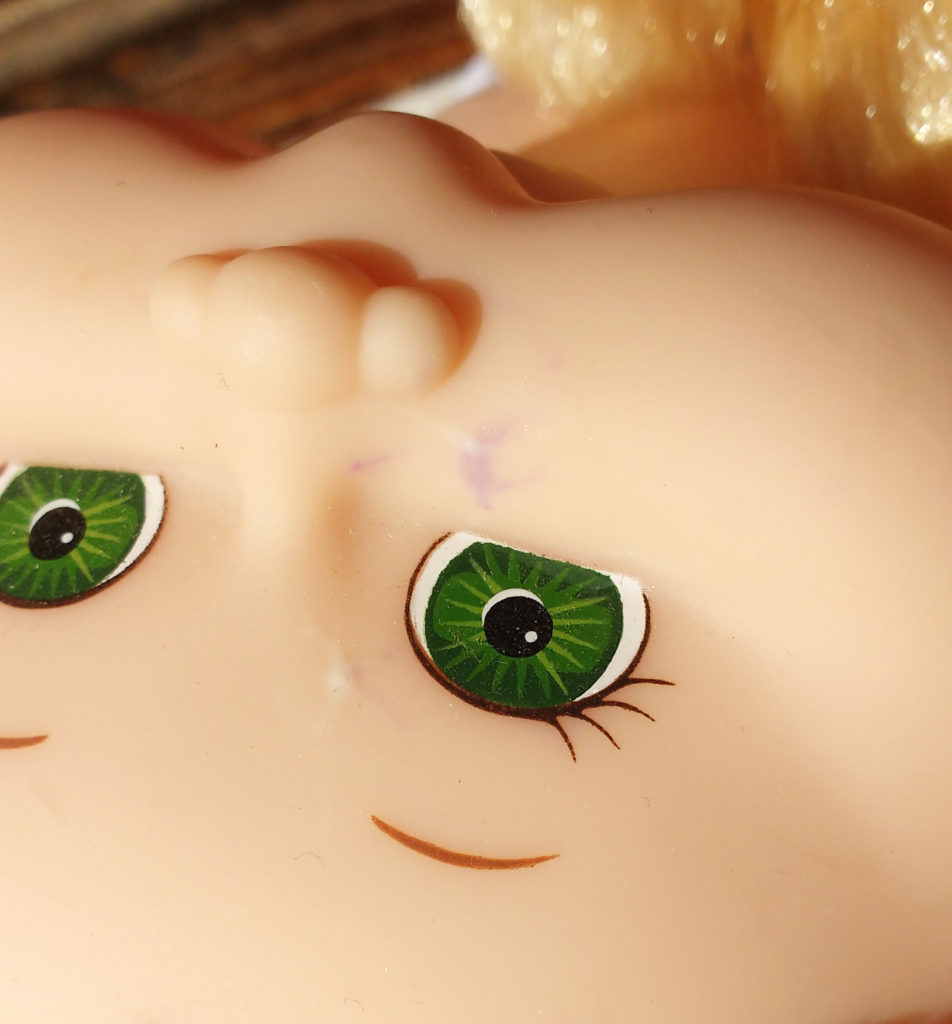
She had an ink mark right under her eye, and I wasn’t sure if I was going to be able to get it off. There is a secret to getting ink stains off dolls, and sometimes it works and sometimes it doesn’t.
How To Remove Ink Stains from Dolls
I snatched up my trusty tube of acne cream. Yes, you read that correctly. You’ll need acne cream with 10% Benzoyl Peroxide being the active ingredient. Next, I slathered the cream on the offending ink marks and set her outside in a safe place in direct sunlight. That’s important – this process doesn’t work without good old Mr. Sunshine.
Woohoo – it worked! A day or so later she was stain-free and beautiful again! She had already had a nice bath, so I got to work.
[Promo] Check out this free video tutorial on How To Clean A Cabbage Patch Kid Doll!
Making A Basic Cabbage Patch Angel Dress
As many of you know, I am a fabric scrapaholic. I give all the reasons for why I use old clothing in my crafting projects in another blog, but basically I don’t see the point of buying fabric or trim for a crafting project if you have a ton of yummy scraps and old clothing and found objects just sitting around your house waiting to be exploited. However, if I do need some special fabric I have found no better prices than Fabric.com. So here’s a little shout-out to my fave online fabric buying place:
I found an old white knit top that had stains on it (don’t all white clothes have stains on them?) I placed the Cabbie on the top and basically drew around her with disappearing marker (LOVE disappearing markers!) I wanted to make just a basic sleeveless shift that could be used as an under-dress for many different projects.
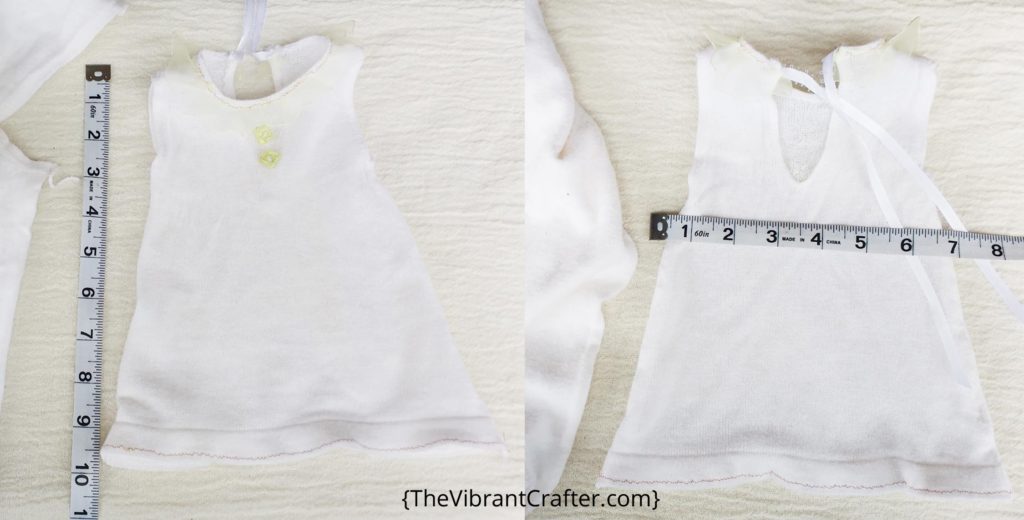
I added a scrap of trim around the neck and sewed it with my favorite Coats bright gold thread to give it some angel zing (okay – I DID buy that!)

Coats Thread & Zippers Metallic Thread, 125-Yard, Bright Gold
I also added a couple of sweet little yellow buttons at the front because I am obsessed with using my entire button stash before I die and it’s BIG!). At the back I just made a turn-in hem and added some ribbon to tie at the neck.
I am a lazy exploiter of good fortune, so of course I made sure to cut the dress so that its bottom hem would coincide with the hem of the original garment. Woohoo – we saved some time!
Now To Make The Sparkly Shiny Over-Skirt
Well this was easy-peasy! I had bought a very bedraggled and torn up little girl’s play dress (a princess outfit maybe?) at the thrift store. The clerk must have thought I’d gone nuts. (Correct.) I figured it would come in handy someday. (Also correct.)
I trimmed off the raggedy bits which left me with a sort of star-shaped frilly skirt. Some new elastic measured to fit the Cabbie’s waist and I was in business.
How To Make Angel Wings for A Cabbage Patch (or other) Doll
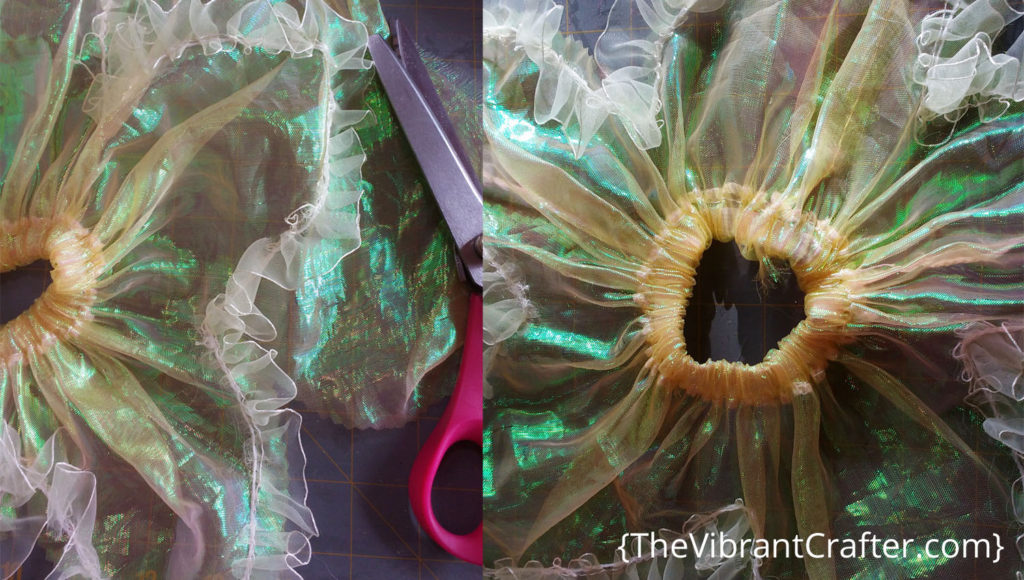
As I said before, I am a big fan of taking advantage of what I already have to hand. And as I have twin girls I naturally had an old set of flimsy fairy wings that someone had long since outgrown. (Did I throw it away? Heck no!)
I placed the scraggy wings on the table and hand-drew a doll-sized set of wings right on the back using my disappearing fabric pen (the fabric doesn’t disappear – just the marks made by the magic fabric pen). Then I cut them out, adjusting and trimming to get the shape I wanted.

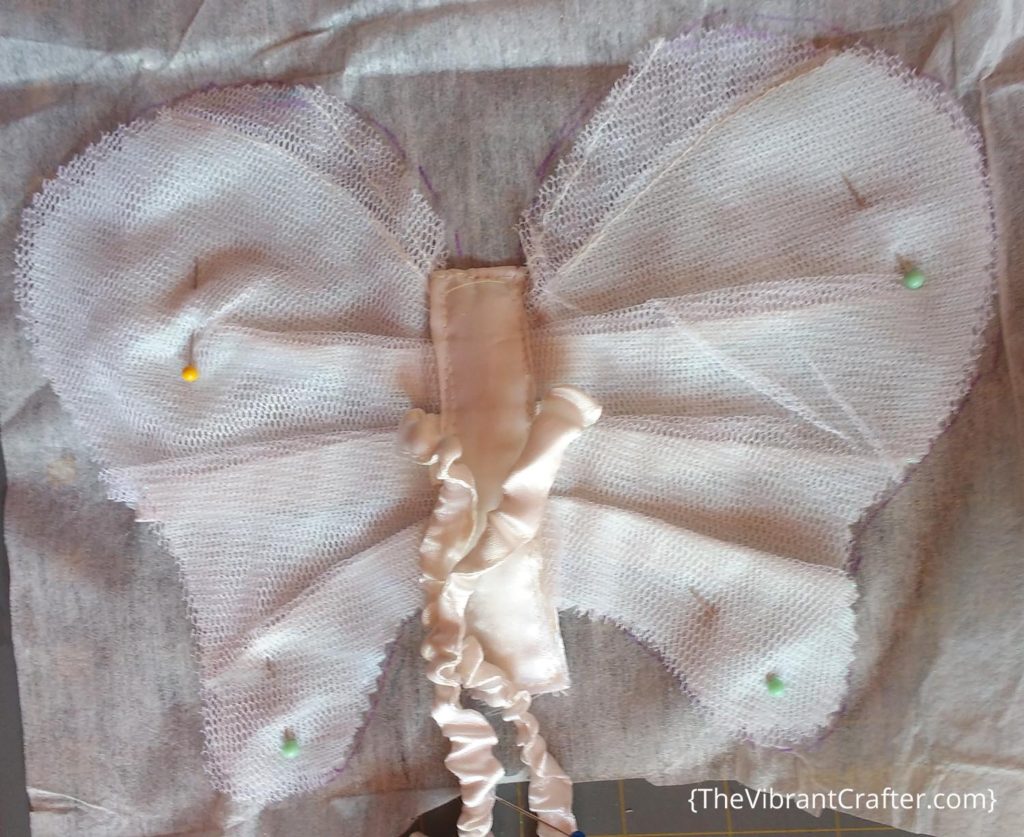
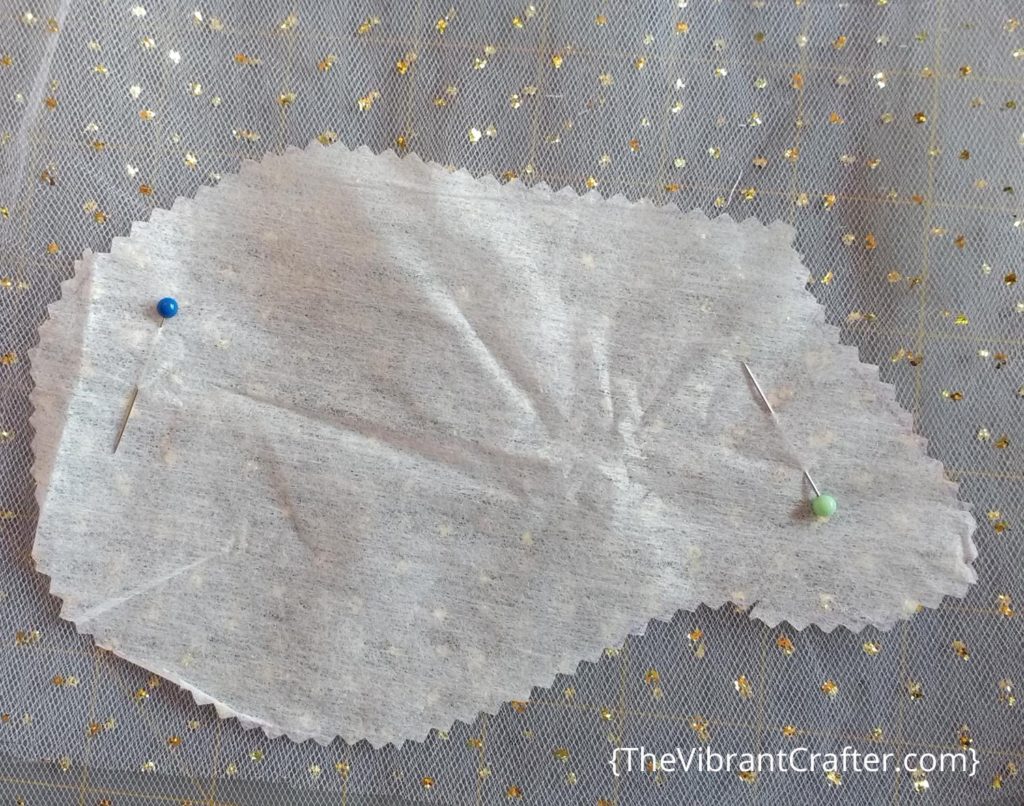
The wings were too flimsy for me, plus I had a piece of really yummy tulle with gold sparkly dots on it that I wanted to use, so I got to work. First I cut out a piece of iron-on fusible interfacing – one for each wing.
Then I used one of those pieces of interfacing to trace the same shape on the glittery tulle. I cut them out.
Notice I used my fabulous pinking shears. I could absolutely not be without a good pair of pinking shears. Wayne-Face buys them for me every Christmas because I use them so much I literally wear them out. (Seriously – don’t skimp and get cheapo scissors and pinking shears – they’ll be a waste of your hard-earned moolah.)
Once I had the layers of interfacing and sparkly tulle lined up I stitched each wing with the gold thread about 1/4 inch in from the edges. Then I trimmed them with the pinking shears. 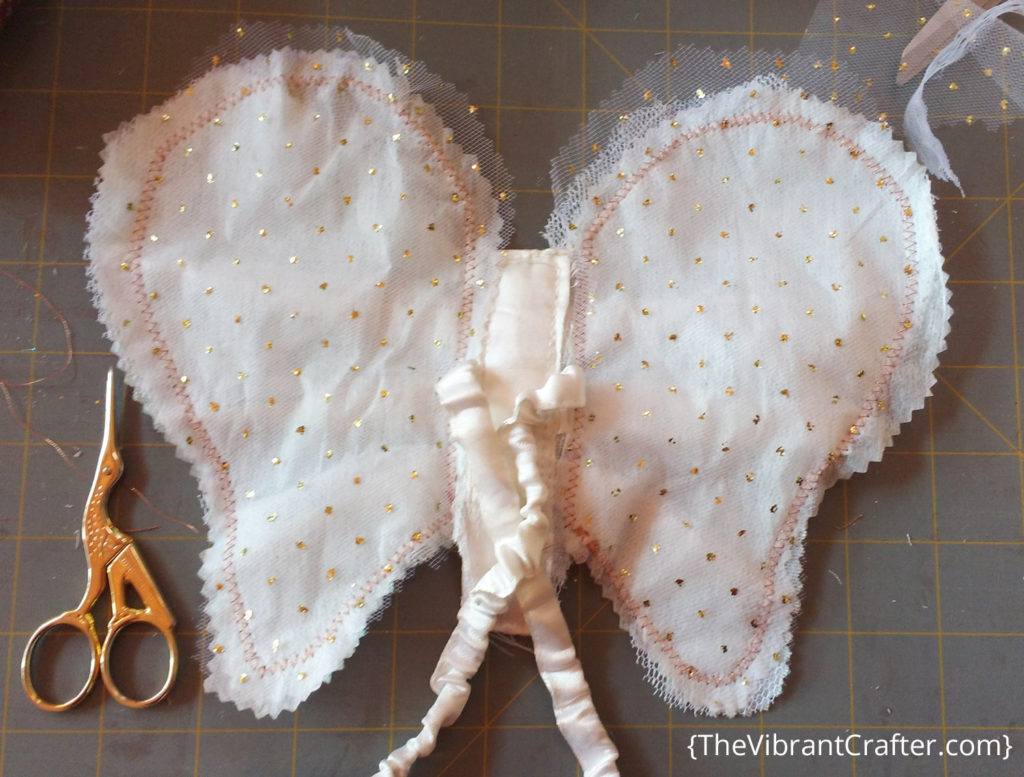
Now my doll’s angel wings were flappy rather than floppy, and they had a satisfying sparkle from all the gold blingy thead and fabric. I was satisfied. Next I stitched a length of narrow white ribbon folded in half to the middle of the wings at the back. That way it could be wrapped over her arms and around her back and tied into a bow.
That Moment When You Just Know – The Final Touch
I was almost done. I fixed up here hair with two clear sparkly bobble-ties I found at the same thrift store as before. The elastic was all stretched out and again the clerk eyed me suspiciously. I just added some new elastic and she looked as good as new.

At this point I was very pleased with my Cabbage Patch angel doll – but the more I admired her, the more it seemed as if something was missing.
As I stared at her I remembered that a sweet LoveAgain Doll Project volunteer had donated a bag of trinkets – little necklaces and bracelets – for use with the “uploved” dolls. I rummaged through that bag and found the perfect item.
And as I placed the little plastic necklace on her at the last moment, I realized. This was not about an angel. This was about a little girl dressed up as an angel. Which made her the most perfect angel of all!

Have you ever made an angel doll? Feel free to share your project pics and links in the comments below.
Hugs and blessings,

Mandy
P.S. Again, if you’d like to do an awesome Cabbage Patch makeover, check out my easy and fun Cabbage Patch Mermaid course!
P.P.S. I know you know this, but in this post there are some affiliate links to products I use, like and trust. Doing that helps me to share my favorite projects with you for free. Enjoy. x0x0x0x0x
This doll is so adorable. I think I am going to start searching for things to make me one too. Thank you for this tutorial!
You are more than welcome, Bernice. I’m so glad she inspired you. <3