How to Make a Blythe Doll Wig Cap for Almost Nothing So That Her Wig Stays On Easily!
Recently I got a bald Blythe doll for my birthday. I don’t typically spend very much on dolls as I get them either given to me or at Goodwill, so I got her bald because that made her affordable for my budget.

You can buy the basic Blythe body parts on Amazon or Ebay, and sometimes you can find someone who is selling one. It’s just a more economical way to own a Blythe doll. But if you want a brand new Blythe doll with all her hair, Ebay is probably your best bet.
I really loved this doll at first sight, and I named her Bonnie. However, bald is bald people, and nobody is going to love a bald, naked doll for very long. This Blythe needed some hair!
While there are lots of Blythe doll wigs out there that you can buy, they were still out of my comfortable (sensible) doll budget range.
So I came up with a vibrantly thrifty plan for Bonnie to have some hair!
I had a handful of doll wigs lying around the house because well, dolls are my thing and I can’t pass up a lonely doll wig at a thrift store. Sometimes I rescue wigs from broken porcelain dolls (the cheap reproductions from the 80’s and 90’s), and sometimes I just get lucky.
I snatched up Bonnie and tried a few of the wigs on her. All well and good, but they kept sliding off her shiny bald head. (I sympathize with men who feel like they have to wear hair pieces.) Bonnie needed a wig cap.
What Is A Wig Cap?
A wig cap is something you can place on your head (or your doll’s head in this case) that will help a wig stay on properly. With humans it’s usually something soft and flexible that covers your existing hair. For a Blythe doll that has smooth, shiny, plastic skin, something more firm is needed. A second skin, if you will, that will stick to the head but not to the wig!
Doll Wig Cap Tutorial
This project could actually work for any doll with a slippery head that needs a wig stabilizer.
Materials – you’re going to need:
- Mod Podge (what? TELL me you have Mod Podge in your house!)
- Some rubber bands
- Kitchen plastic wrap
- A scrap of absorbent fabric – old tee shirt fabric is fine. It’s best if you can get a natural color that matches your doll’s skin.
- Some hook and loop tape or dots
- Scissors
- A doll stand or a largish glass jar to set her in while her head dries!
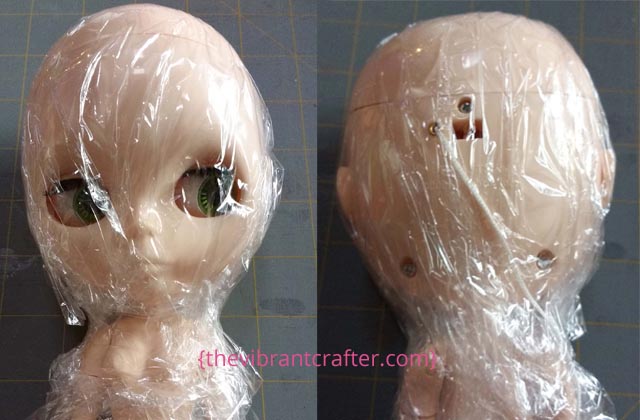
Step 1: Wrap the doll from head to toe in kitchen plastic wrap – the kind that clings to itself. This is to protect her from scratches, dings and Mod Podge splodges.

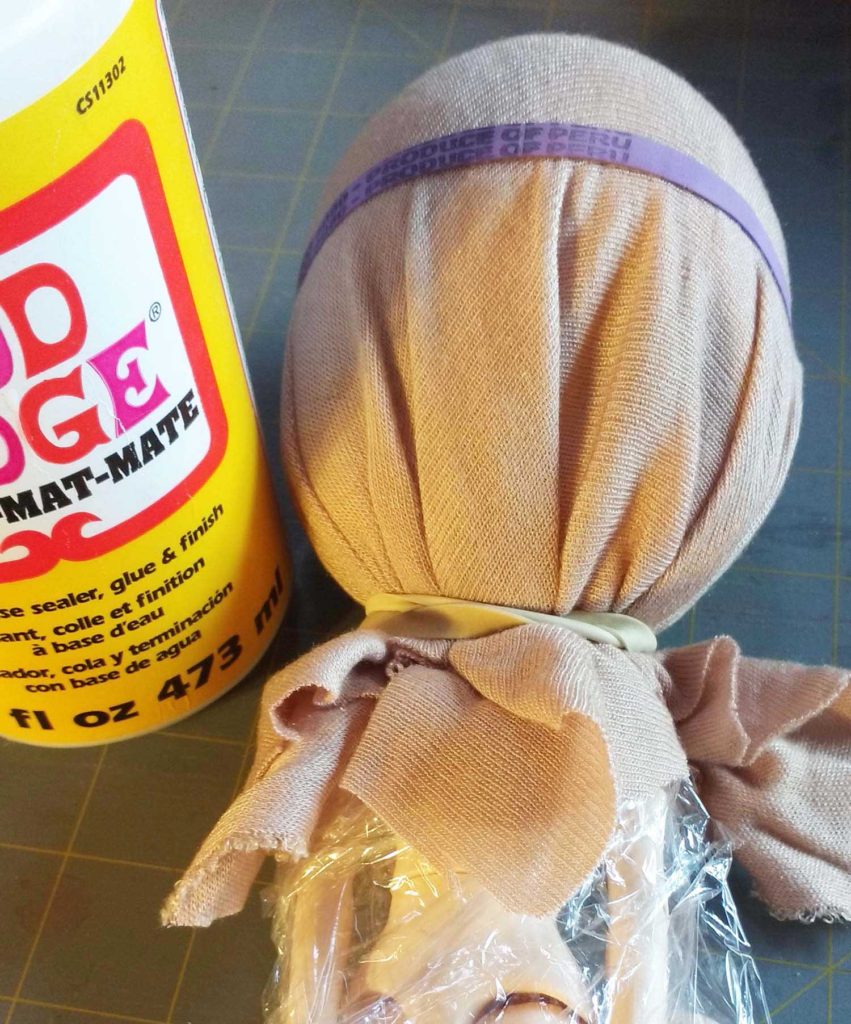
Step 2: Put the fabric over her head, stretching it gently. Place a rubber band over her head and around her neck to secure it. Ease the fabric to minimize folds.
Step 3: Place another elastic band around the perimeter of where the wig(s) will sit. You don’t want the wig cap to show once the wig is in place so this is where you’ll trim it.

Step 4: using an old brush or rag, Mod Podge the surface of the fabric just in the area where the wig will sit. (Yes, I am aware that this is starting to look a bit creepy. Bear with me . . .)

Step 5: Allow to dry. Repeat twice more (3 coats in total).
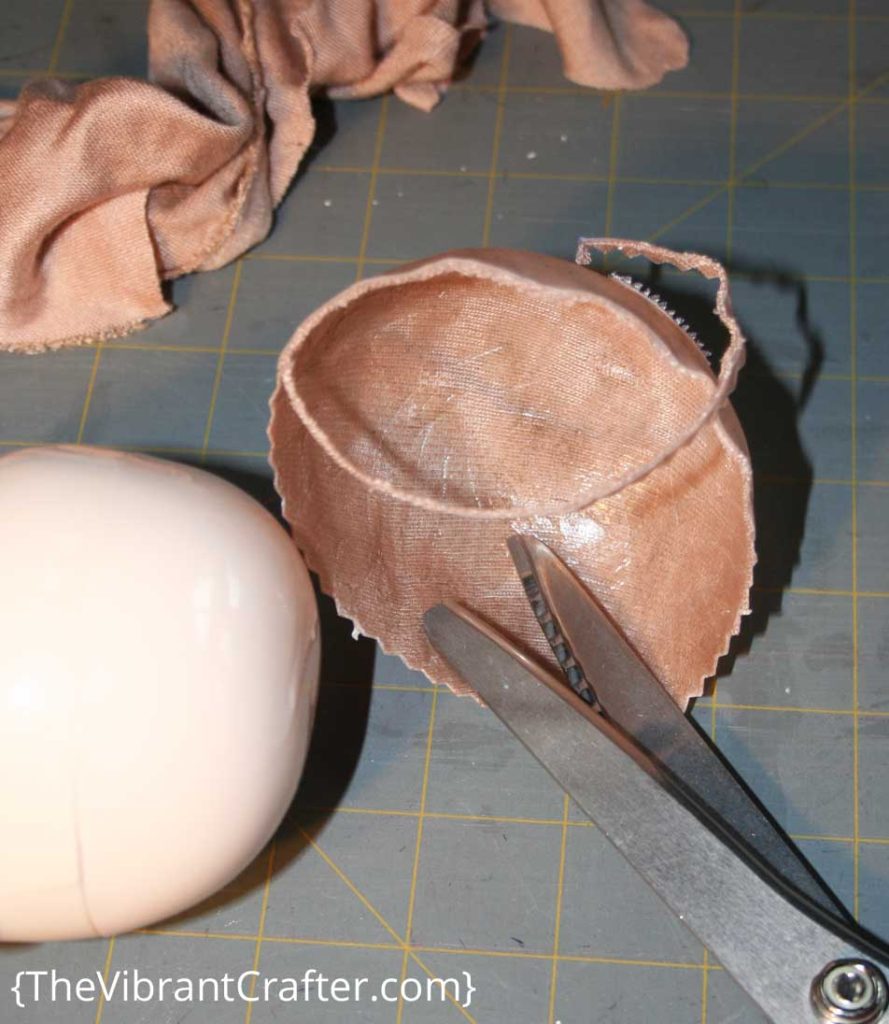
Step 6: Once dry, trim off all the fabric below the upper rubber band. Remove both rubber bands, and continue to trim until you have the size that will work for your doll. Now you should have a wig cap that fits your doll snugly.

Extra tips: For the final trim I like to use my OLD pinking shears (not my nice sharp fabric shears) so that the wig cap has a zig-zag edge. That way it looks more natural.
Step 7: Attach a small piece of hook and loop tape to the top of the wig cap and to the wig(s) you’re going to use. Make sure you position the tape so that the wig will end up where you want it to be on her head.

Testing The Wig Cap
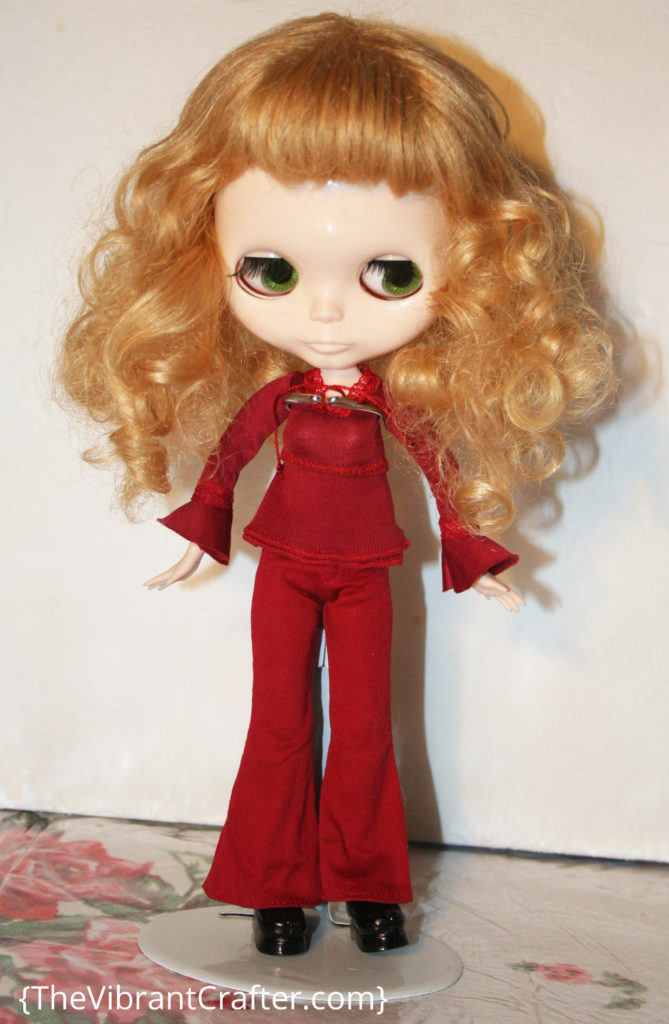
Well my Bonnie is always happy to model new clothing, wigs, shoes, and any other accessories I find or make for her. Here she is modeling the wigs I had on hand that fit her well and looked snazzy.

Curly honey-colored wig rescued from a broken porcelain doll.

Straight ash blonde wig found randomly by itself at a thrift store. Cost about .50 cents.

Short brown wig that came with a grab bag of assorted doll clothes. {This is her Marmite pose. Yes, I adore Marmite in all its wonderful forms.}
None of these doll wigs cost me more than two or three dollars if that, and the wig cap cost almost nothing. I also got to use up a scrap of fabric and recycle a couple of elastic bands and an old yucky sponge brush. My favorite kind of project!
How about you? Have you ever wigged a doll? Feel free to share in the comments.
Hugs, Mandy
